© Saulius Aliukonis
Learning Tools
AMIC FRAMEWORK
- Category: artists, Learning Tools, Research, target groups
Name of the tool:
What the result will look like:
A formal but flexible structure for improvisation enabling playful connection with individuals, particularly those considered hard to reach.
Description of the tool:
When it can be used:
Who it’s useful for:
Length of process:
Main features - advantages:
Main features - disadvantages:
Guidelines for implementation:
Tool in practice:
Attachments / Images:
MULTIPLIER SESSIONS
- Category: artists, Learning Tools, Research, target groups
Name of the tool:
MULTIPLIER SESSIONS
What the result will look like:
Short events to share knowledge inside the organisations.
Description of the tool:
The Multiplier Session is a concise gathering where a healthcare clown artist (or group) with knowledge and experience in working in a certain context (e.g. with a specific audience, using certain artistic tools or techniques, etc.) shares insights within their organisations or with artistic peers/communities.
This dynamic exchange of knowledge will focus on different aspects, including audience preferences, the use of specific artistic resources or the use of unique techniques.
Whether sharing insights within their own organisations or engaging with artistic peers and communities, this type of events – where a clown artist (or a group of clown artists take on the mission to share their knowledge and drive collaborative learning – facilitates the sharing of expertise and enriches the collective understanding of artistic activities tailored to specific audiences.
When it can be used:
The session facilitates the dissemination of valuable knowledge, fostering a more informed and skilled team.
This tool is most effective when there is a need to share knowledge within an organisation or community.
It can be used at any stage of the healthcare clowning process to enhance the team’s understanding and approach to specific audience groups.
Who it’s useful for:
The Multiplier Session is beneficial for healthcare clown artists and teams seeking to broaden their expertise in addressing the unique needs and nuances of specific audience groups.
It serves as a targeted learning opportunity for those working in diverse healthcare settings. Conducting these sessions empowers the artists.
Length of process:
The session is designed to be a brief and focused event, typically spanning a short duration to efficiently communicate specialized knowledge without disrupting the regular workflow.
As it is based on sharing existing knowledge and expertise, the preparation is not time-consuming.
Main features - advantages:
Specialized Knowledge Transfer: Enables the transfer of in-depth knowledge from a specialist to the broader team.
Efficiency: Offers a quick and targeted approach to learning, minimizing disruptions to regular activities.
Team Building: Promotes a shared understanding and collaborative approach within the healthcare clowning team.
Main features - disadvantages:
Limited Scope: The session may focus on a specific audience or context, limiting its applicability to broader healthcare clowning practices.
Dependency on Expertise: Success relies on the availability and willingness of a healthcare clown artist with specialized knowledge to share.
Guidelines for implementation:
Identify Expertise: Recognize individuals within the organization with specialized knowledge in a particular audience context.
Define Objectives: Clearly outline the goals and specific knowledge to be shared during the Multiplier Session.
Structured Format: Design the session with a focused and organized format to maximize information transfer.
Gather Input: Incorporate information from used reporting tools (written reports, observation forms etc.) into the training process.
Active Participation: Encourage active engagement and questions from participants to enhance learning.
Tool in practice:
During ClowNexus, there were multiple occasions where the multiplier sessions were used. The artists directly involved in ClowNexus shared the learnings and new perspectives with team members in their respective organisations during local/regional/national workshops, dissemination events, national camps, etc.
Origin of the tool:
This is a commonly used tool by organisations that want to extend knowledge and experience across the organisation.
LEARNING QUESTIONS
- Category: artists, Learning Tools, Research, target groups
Name of the tool:
LEARNING QUESTIONS
What the result will look like:
A set of questions that guide the learning process.
Description of the tool:
A set of Learning Questions is like a roadmap for guiding learning in a project that aims at designing a specific type of intervention (e.g. in a healthcare clowning project addressing a new audience or testing a new artistic approach).
It involves crafting a set of thoughtful questions to guide your learning journey.
Start by talking to your project team and stakeholders, understanding their expectations and what they hope to discover.
Collect these insights, identify common themes, and organize an ideation session to collaboratively decide on the key learning questions. The questions should be open-ended, encouraging deep reflection and exploration.
Importantly, they should address knowledge gaps and inspire progress in your project.
When it can be used:
Start developing learning questions at the project’s outset.
Adapt them as the project evolves to stay aligned with your goals. Regularly review and refine the questions throughout the project to maintain their relevance.
This tool helps you set a clear direction for your healthcare clowning project.
By answering these questions, you aim to fill knowledge gaps, enhance understanding, and continuously improve your interventions.
It fosters a collaborative learning environment, ensuring that everyone involved is aligned in their goals and expectations.
Who it’s useful for:
This technique is valuable for project leaders, healthcare clown performers, partners, and stakeholders involved in the project. It ensures a shared understanding of project goals and facilitates collective learning.
Length of process:
The process is ongoing, starting at the project’s beginning and evolving as needed throughout its duration. Crafting the questions and seeking feedback may take a few collaborative sessions, but the continuous review and refinement are integral to the learning journey.
Main features - advantages:
Alignment: It aligns everyone involved in the project, fostering a shared vision.
Depth of Exploration: Open-ended questions encourage thoughtful reflection and exploration, leading to a deeper understanding.
Adaptability: Questions can be adapted as the project progresses, ensuring continued relevance.
Collaboration: Involving project partners in question development ensures relevance and shared ownership.
Main features - disadvantages:
Time Investment: Crafting and refining questions may take time, requiring commitment from the project team.
Subjectivity: The interpretation of open-ended questions can be subjective, requiring careful consideration during analysis.
Guidelines for implementation:
Early Involvement: Start early and involve all project stakeholders in the development of learning questions.
Open-ended and Probing: Craft questions that are open-ended, using probing words to encourage thoughtful responses.
Avoid Bias: Ensure questions are neutral and unbiased to promote objective exploration.
Feedback Loop: Seek regular feedback from participants and stakeholders to refine questions.
Continuous Review: Regularly review and adapt questions to stay aligned with the evolving needs of the project.
Tool in practice:
A set of learning questions accompanied us during our project. Take a look to gain an insight into the questions that inspired our processes and which we consistently asked ourselves at regular intervals.
The questions were drafted in the frame of our Baseline Evaluation and based on consultations with the project participants and partners. During the project, we slightly adapted them to ensure that they remained relevant to our learning needs.
The ClowNexus team regularly came back to the learning questions to ask themselves whether their activities were still providing answers. Furthermore, the team used the learning questions to structure the findings of the project. Within ClowNexus, we used the learning questions as an informal framework to guide us in the background.
Attachments / Images:
Origin of the tool:
This is a common tool for monitoring, evaluation and learning. The learning questions showcased above were specifically developed during Clownexus.
POST-VIST REPORTS
- Category: artists, Learning Tools, Research, target groups
Name of the tool:
POST-VIST REPORTS
What the result will look like:
Written analysis of the clown visits.
Description of the tool:
The artists write a report of the clown visit right after the visit. The report usually follows the same format, combining closed questions to gather quantitative data and open questions to facilitate reflection.
Depending on the needs of the organisations and artists, it can be:
– a short survey (either online or printed) to be filled in,
– a long-form diary format that focuses on a narrative description,
– a free-form account of the visit following more generic indications of data to be covered.
The reports can be collected through an online tool (e.g. Slack, a shared drive).
When it can be used:
The post-visits reports can be used for personal reflection, in-depth understanding of tools and skills and for data collection. They prove to be very useful when addressing new audiences or testing new techniques, as the analysis of the reports can lead to informed, evidence-based decisions.
Who it’s useful for:
Artists can gain valuable insights on successful moments, can identify effective artistic techniques, and pinpoint areas for improvement.
Project managers can create an analysis based on multiple reports to identify trends that can offer a comprehensive understanding of the impact of artistic interventions.
Length of process:
The reporting process should be concise and manageable, typically taking 15-20 minutes. This ensures that artists can efficiently capture their reflections without it becoming a time-consuming task. The diary format that focuses more on reflection and a more detailed, narrative description of the intervention can take about an hour to fill in.
For analysis purposes, this activity should be repeated, constantly implemented over a longer period of time, depending on the objectives of the analysis.
Main features - advantages:
Self-reflection: The tool offers a straightforward and accessible way for artists to reflect on their experiences.
Balanced account of the intervention: It encourages thoughtful consideration of both successful and challenging moments, fostering continuous improvement.
Flexibility: The tool is very adaptable, allowing for personalized approaches to reporting.
Main features - disadvantages:
While the reporting tool is generally straightforward, potential disadvantages include the subjective nature of self-assessment and the need for consistent documentation. Artists may find it challenging to capture the essence of complex interactions in a brief format.
Guidelines for implementation:
Consistent Documentation: Encourage artists to consistently and promptly document their reflections after each interaction.
Structured Prompts: Provide a set of prompts to guide artists in capturing key elements such as special moments and effective artistic techniques. Provide also closed questions or quantitative inputs.
Regular Review: Schedule periodic reviews of the reports to identify patterns, share insights, and inform future artistic interventions.
Encourage Honesty: Create an environment that encourages honest reflection, emphasizing that both successes and challenges are valuable for growth.
Consent: Always be aware if you have the legal and ethical right to share internally what happened during a visit.
Tool in practice:
During ClowNexus, post-visit reports took many forms.
The tools that were developed specifically during ClowNexus helped the artists organise their self-reflection and the reports on the visits. For example, the Learning Platform (a set of forms shared on the project cloud drive) has proven to be helpful for artists. The artists’ perspectives on their work acted as a form of analysis and self-analysis, with personal reflections serving as qualitative indicators of the artistic work.
The pages from the Learning Platform revealed essential information by often describing, in detail, the tools used by clown artists with the two target groups. Additionally, the partners used their own formats: short visits reports shared on the organizational Slack channels or longer narrative reporting shared within a smaller team.
Attachments / Images:
Origin of the tool:
This is a common tool for monitoring, evaluation and learning. The examples shared above were specifically developed during Clownexus.
PLAYING BY THE RULES
- Category: artists, Learning Tools, Research, target groups
Name of the tool:
PLAYING BY THE RULES
What the result will look like:
A set of posters depicting the sets of formal and informal rules relevant for different stakeholders.
Description of the tool:
Playing by the Rules is an engaging learning exercise designed to explore and understand the professional universe of the individuals who contribute to the well-being of the beneficiaries, with the aim of adopting a realistic, empathic and mindful approach to improving performance.
The exercise can be carried out within a group of clown artists or it can involve other different types of stakeholders (medical staff, nursing staff, managers, etc.) if the exercise is carried out in a setting that allows the presence of external actors.
Usually, in the latter scenario, the exercise is conducted with the primary aim of understanding the context of a partnership and jointly defining the context for setting common goals and work.
Participants work together to create visual posters depicting the rules governing the roles of different relevant actors (e.g. health workers, social workers, clown artists). The posters give an insight into the reality of each professional role.
Participants can add details about likes, dislikes, what can be a barrier, what are the motivations, etc. A facilitated discussion follows, encouraging participants to compare realities, find common ground and promote constructive collaboration.
When it can be used:
Through “Play it by the Rules,” participants gain a comprehensive understanding of the diverse professional perspectives.
This exercise promotes empathy, facilitates dialogue, and identifies opportunities for collaborative efforts to enhance the overall well-being of beneficiaries.
This exercise is most effective during the learning and development phase, offering participants a unique opportunity to explore and appreciate the varied professional landscapes.
It contributes to efforts in designing efficient progamming.
Who it’s useful for:
This tool can help artists gain a better understanding of the different factors that can shape the success of a clown visit.
It can also be beneficial for project managers and other staff members in the clowning organisation that are interested in analysing relevant partnerships and ways to improve collaboration.
If the exercise is done in a larger, more heterogeneous group, its benefits extend fostering understanding, collaboration, and innovation among diverse stakeholders in healthcare settings.
It enables healthcare staff to find common ground with clown artists, leading to shared goals and more effective problem solving.
Ultimately, the exercise creates a platform for improved relationships, empathy and shared responsibility between the stakeholders involved, which has a positive impact on the overall wellbeing of beneficiaries.
Length of process:
The “Play it by the Rules” exercise can be integrated in a larger event or can be organised as a standalone workshop. It typically takes 90 to 120 minutes, allowing sufficient time for poster creation, sharing, and in-depth discussion.
Main features - advantages:
Visual Representation: Posters offer a visually impactful representation of the rules and realities of different professional roles.
Empathy Building: Participants gain insights into the motivations, likes, and dislikes of each role, fostering empathy and understanding.
Collaborative Dialogue: Facilitates open and constructive conversations on common ground, differences, and potential areas of collaboration.
Strategic Negotiation: Encourages participants to explore how different roles can work together strategically to achieve shared well-being goals.
Main features - disadvantages:
Subjectivity: Interpretations may vary based on individual perspectives and experiences.
Prior research: It is important to include the perspectives of the different stakeholders. If they are unable to attend the workshop itself, it is important to carry out prior research and gather comprehensive data so that the posters reflect the real experiences of the stakeholders.
Guidelines for implementation:
Assure fair representation: If the exercise is done only in a group representing artistic organisation, make sure that all roles represented are clearly defined and assigned. If posters are to be made on behalf of a type of stakeholder that is not present in the room, make sure that the participants that are imagining the rules governing a certain group have a clear, un-biased understanding of that group.
Poster Creation: Provide materials for creating visually expressive posters that encapsulate rules, likes, dislikes, and motivations.
Sharing Session: Allow participants to present and share their posters, fostering a collective understanding.
Facilitated Discussion: Guide a discussion on commonalities, differences, and collaborative opportunities among the professional roles.
Action Planning: Encourage participants to collaboratively develop action plans for constructive interprofessional collaboration.
Tool in practice:
This tool was used as part of PAR – Participatory Action Research (a research coordinated by the Leyden Academy of Ageing and Vitality in collaboration with RED NOSES International, CliniClowns Netherlands, ROTE NASEN Clowndoctors in Austria and ROTE NASEN Deutschland).
Attachments / Images:
See a description of the method here.
This video was an in-house production by CliniClowns for training puroposes, it is not intended for dissemination.
Origin of the tool:
This tool was part of the PAR methodology proposed by the Leyden Academy of Ageing and Vitality.
SHOWING VULNERABILITIES
- Category: artists, Learning Tools, Research, target groups
Name of the tool:
SHOWING VULNERABILITIES
What the result will look like:
A ritual that transforms fears into strengths in an open and safe space.
Description of the tool:
“Showing Vulnerabilities” is a transformative learning exercise encouraging participants to embrace failure and share their fears in a supportive circle. Participants sit together in a sharing circle, openly discussing their anxieties and aspirations. The activity promotes a safe space for vulnerability, with participants verbalizing their fears, desires, and need for support.
Through the ‘Showing Vulnerabilities’ exercise, participants cultivate their resilience, deepen their connections and build a supportive community. Individuals build a foundation of trust and develop the ability to navigate challenges and uncertainties in their healthcare clowning practice by openly discussing fears and expectations.
When it can be used:
This exercise is used at crossing points of the learning process, when emotional check-ins are needed. It serves as a powerful bridge, allowing participants to reflect on their journey, express vulnerability and set the tone for a collaborative and supportive working environment.
Who it’s useful for:
Artists have the opportunity to share their thoughts, fears, and expectations around new processes or new tools.
Length of process:
The duration of this activity varies but typically ranges from 45 to 60 minutes, providing ample time for participants to share their thoughts, fears, and expectations within the circle.
Main features - advantages:
Community Bonding: Strengthens connections within the group through shared vulnerabilities.
Open Communication: Encourages honest and open communication about fears and expectations.
Main features - disadvantages:
Emotional Intensity: The exercise may elicit strong emotions; facilitators should be prepared to manage sensitive discussions.
Guidelines for implementation:
Establish Safe Environment: Create a safe and non-judgmental space for open sharing. It is recommended that the group does not exceed 12-15 people to ensure that a sense of safety can be achieved.
Clear Guidelines: Clearly communicate the rules, emphasizing respect, active listening, and confidentiality.
Facilitator Sensitivity: Facilitators should be attuned to participants’ emotional states and provide support as needed.
Physical Contact Preferences: Allow participants to express their comfort levels with physical contact and group interactions, especially when asking for the support of the group (does a hug help or one would prefer there will be no hugs?).
Encourage Support: Participants verbalize how others can support them, fostering a collaborative and supportive atmosphere.
Tool in practice:
During ClowNexus, “Showing Vulnerabilities” was used in the final Artistic Laboratories.
Origin of the tool:
This tool is based on an activity initiated by Elda Gallo, an Italian-born choreographer, performer, dancer and teacher based in Vienna, Austria.
Timeline
- Category: artists, Learning Tools, Research, target groups
Name of the tool:
Timeline
What the result will look like:
A visual representation of key events and lessons learned, presented in a temporal dimension.
Description of the tool:
The “Timeline” exercise is a creative learning tool to visually map participants’ learning and artistic journeys over time. Using a temporal framework, individuals are encouraged to document significant activities, events, and key learnings using a combination of words, colors, drawings, pictures, and symbols.
These personal timelines serve as dynamic visual representations of their unique experiences and insights.
When it can be used:
Through the “Timeline” exercise, participants can reflect on their learning progression, identify milestones, challenges, and highlight moments of growth. It can be used to present processes and outcomes and to draw out lessons learned during or at the end of a learning process.
Who it’s useful for:
The “Timeline” activity is most effective during the evaluation and reflection phases.
Artists and project managers can create their individual, team or organizations timelines as an exercise, summarizing and visualizing their individual journeys and the journey of the organisation.
Length of process:
It is an exercise that is typically integrated in a larger event. The “Timeline” activity typically ranges from 30 to 60 minutes (depending on the number of participants), allowing everyone sufficient time to create (if the timelines are developed on the spot, during a meeting) and share their timelines. The collective discussion that follows may extend the overall duration.
Main features - advantages:
Visual Representation: Enables participants to visually map and share their learning journeys.
Personal Reflection: Facilitates self-reflection on individual growth, experiences, and key learnings.
Group Dynamics: Fosters a sense of community as participants share and relate their stories.
Creative Expression: Allows for diverse forms of expression, including words, colors, drawings, and symbols.
Main features - disadvantages:
Time Consumption: Depending on the group size, the sharing and discussion phase may extend the overall duration of the activity.
Additional resources: It requires resources to encourage creative takes on the timelines (e.g. coloured markers, photos, etc.)
Guidelines for implementation:
Materials: Provide participants with a variety of materials such as markers, pens, paper, and visuals to enhance creative expression.
Group Sharing: Allocate time for participants to share their timelines with the group, encouraging open discussion and connections.
Facilitator Guidance: Facilitators can offer support during the creation process and guide discussions to draw connections between participants’ timelines.
Tool in practice:
During ClowNexus, “Timeline” was used in Artistic Laboratories and during the final session marking the end of the project. The clown artists were asked to plot their experience in ClowNexus in the temporal dimension.
Origin of the tool:
This is a commonly used tool in educational contexts, trainings, strategic planning, etc.
Show or Tell
- Category: artists, Learning Tools, Research, target groups
Name of the tool:
What the result will look like:
A visual or a narrative presentation of the artists’ the perception on artistic practices (subject of the learning process).
Description of the tool:
“Show or Tell” is a dynamic learning exercise, designed to facilitate the understanding and application of artistic tools. In this activity, participants showcase how they used artistic tools in practice through either verbal explanation (tell) or practical demonstration (show). The presentation can include different aids such as pictures, objects, quotes, or mini-games.
When it can be used:
The primary aim of “Show or Tell” is to deepen the artsts’ understanding of artistic tools and their potential. The practical application of the tools can be expanded through peer sharing.
Through this exercise, artists can share their insights, which can contribute to the evaluation of the scope of artistic tools and the discovery of different perspectives. This activity is particularly effective when introducing new tools.
Who it’s useful for:
The artists can employ “Show or Tell” to articulate and showcase how they have integrated artistic tools into their practice.
Length of process:
It is an exercise that is typically integrated in a larger event. The duration of the “Show or Tell” exercise varies based on the complexity of the tools being presented and the number of participants / teams.
Typically, a presentation can take around 15 minutes, allowing sufficient time for both explanation and demonstration.
Main features - advantages:
Interactive Learning: Engages participants in an interactive and dynamic learning process. It facilitates experiential learning through practical demonstrations.
Diverse Presentations: Allows for a variety of presentation styles, accommodating different learning preferences. It enhances communication and presentation skills.
Knowledge Sharing: Facilitates the sharing of practical insights and experiences among participants.
Main features - disadvantages:
Preparation is required: It requires additional time beforehand for preparation from the artists and the potential use of props (in the case of the “Show” variant)
Difficulty in estimating time: Depending on the number of participants, the process could extend beyond the allocated time.
Guidelines for implementation:
Clear Instructions: Provide participants with clear guidelines on how to structure their “Show or Tell” presentation. Give them an indication on how to choose necessary materials, visuals, or props to effectively demonstrate the use of artistic tools.
Encourage Creativity: Emphasize the use of creative and interactive elements to make presentations engaging.
Time Management: Ensure that each participant has an appropriate amount of time for the presentation, with a balance between depth and concision.
Tool in practice:
During ClowNexus, the artists presented in the Artistic Laboratories their experiences testing the new artistic tools and shared the main learning points through “Show or Tell”. The team had around 20 minutes to present.
Attachments / Images:
Origin of the tool:
This tool was developed in the ClowNexus project.
Direct Observation Form
- Category: artists, Learning Tools, Research, target groups
Name of the tool:
DIRECT OBSERVATION FORM
What the result will look like:
A written on-the-spot account of the clown vist
Description of the tool:
This tool is a checklist to assess conditions and reactions of participants observed during a clowning visit.
Observers attend a clown visit in person and fill in a standard form organized into 5 major areas in which clowning is expected to have an effect on participants: mood, stress, attention, physical behaviour and connection. Observers are asked to note each unique instance of a positive change in the effect area, and to provide a brief description of the change observed. They were also encouraged to review the results with a caregiver or someone who know the participants well in order to validate and interpret what occurred during the session.
When it can be used:
The tool can be used to understand the effects of clowning for participants (people with dementia, children with autism etc.)
Who it’s useful for:
The clowns can use the observations to understand the effects of the visits and adapt their interventions.
The project team / organisation can process a greater set of data (if there is a systematic collection of the observation forms) to create evidence of the effects of the interventions.
Length of process:
This is a one-off tool that takes about 15 minuted to fill in. To extract deeper learning, it needs to be repeated and time should be allotted for processing the data.
Main features - advantages:
It is time considerate.
The prompts facilitate more openess to notice and capture effects of a visit.
Main features - disadvantages:
The data collected depends on the training and orientation of observers.
Guidelines for implementation:
Explain the purpose of the tool.
It is important to emphasize that the form is not an evaluation of clown performance.
Make sure there is a common understanding of the concepts.
Validate the assumptions.
Encourage observers to validate the information with caregivers.
Tool in practice:
In ClowNexus, this tool was used during the evaluation, both at the beginning of the project and as part of the final evaluation, to understand the effects of clowning and what changes can be observed in time at the level of immediate effects.
Attachments / Images:
Origin of the tool:
This tool was developed in the ClowNexus project.
My Favourite Story
- Category: artists, institutional carers, Learning Tools, project managers, Research, target groups
Name of the tool:
MY FAVOURITE STORY
What the result will look like:
A collection of stories, ranked and interpreted
Description of the tool:
This method focuses around a group discussion where participants discuss and rank stories, to find the favourite story of the group that best illustrates a certain theme.
The facilitator leading this activity firstly collects and edits stories that can illustrate notable moments (i.e. “the positive effects of clowning on older people or children”). Then, a group reviews the set of “special moments” narratives, each participant chooses a favourite story. In the end, as a group, they come to a consensus about their favourite story overall and describe the reasons why.
The group discussion can take 90 minutes to two hours and is organised in six parts:
1. Introduction: Facilitators welcome participants, obtain informed consent, and lead an icebreaker for participants to introduce themselves.
2. Discussion of Stories: Participants identify which story they had chosen as their favourite and why, and react to others. They discuss why and how the effect described in the story is relevant and share their own experiences.
3. Group Vote and Debate: The participants are asked to pick only one story as a group. Debate is facilitated to decide between the two top voted stories.
4. Final Vote: If consensus isn’t naturally reached, participants will vote on their final selection out of the two top stories voted by the group
5. Participant Reflection and Conclusion: Participants share how this activity helped them reach a deeper understanding.
6. Closing
When it can be used:
It can be used to explore shared values among a diverse group and gain an understanding of shared experiences.
Who it’s useful for:
The project team / organisation can use this method to evaluate the impact of the intervention, to identify promising practices and to incorporate different perspectives into implementation. Some stories can be used in raising awareness activities (keep in mind that you need to have consent for this).
Length of process:
It is a short-term process, involving activities to collect and edit stories, a 2 hour session and additional time for follow-up.
Main features - advantages:
The use of stories unearths new and deeper perspectives.
Beginning by talking about someone else’s experience is a useful entry point for discussing own experiences. Participants usually speake openly and freely about their own sensitive experiences after they had developed rapport with each other by talking about the common stories.
Main features - disadvantages:
It can be time consuming.
A clear understanding of the tool is necessary for the facilitator, especially in choosing the stories so they spark debate.
Guidelines for implementation:
Initial story selection matters.
All stories should be at the same level so that they could be plausibly chosen by any participant. In practice, this is difficult to do, and some stories can outshine the others. It is useful to review the stories or potentially pre-test them to see that they illuminate different perspectives.
Don’t forget about the editing.
Remove any identifying information. Edit the stories to be of similar length and detail.
Decide if the discussion will be online or in a face to face setting.
During the ClowNexus project, participants joined by online video conference and viewed a virtual whiteboard at the same time. Two facilitators led the session, with the evaluator observing. The first facilitator had overall leadership for managing the discussion, while the second took notes and organized the virtual white board.
Voting and debate is one way to spark discussion, but not the only option.
Holding a two-round runoff vote for the group’s favourite story is planned to spark deeper discussion and help participants understand and adopt new perspectives. This typically works well in cultural contexts where such competitive debate is welcomed, and if the facilitator keeps the session light and fun. Other methods to encourage discussion include a wider set of discussion questions, exploration of the second-favourite stories, and exploration of the last favourite stories.
Tool in practice:
In ClowNexus, the tool concentrated around stories of ‘special moments’ that described the positive effects of clowning for old people, to uncover what are the perceptions of different stakeholders about healthcare clowning and the impact it can generate at the level of the target group.
Attachments / Images:
Origin of the tool:
This is an adaptation of the Most Significant Change method, which is a qualitative method used for group learning and adaptation. Most Significant Change is a narrative-based tool that generates stories from frontline stakeholders on changes in their lives, organizations, and contexts. Most Significant Change is traditionally used to help program managers understand which parts of the interventions had the desired effect, what other results have emerged, and why and how change occurred. The process of collecting, analyzing, and prioritizing stories through this method provides insight into what an organization values. By repeating the activity over time, the method supports continual learning and adaptation, as well as early identification of successes and failures.
How change happens
- Category: artists, family carers, institutional carers, Learning Tools, project managers, Research
Name of the tool:
HOW CHANGE HAPPENS
What the result will look like:
A map of factors generating change, their effects and the relationships between them
Description of the tool:
This method refers to a facilitated discussion useful in exploring diverse and complex perspectives around a given theme. Participants generate ideas on different factors that influence a change and then they create a visual map of the relationship among different factors: what causes what and how they interact to create change.
The session starts with a short introduction to welcome participants, obtain informed consent, and allow participants to introduce themselves through an icebreaker. Then, using a guiding question (i.e. “What happens during a clown visit?”), participants share their experiences related to the issue discussed. Each individual idea or factor is captured by a second facilitator on sticky notes on a board, and grouped together with similar themes.
While participants take a short break, facilitators check in with each other to reflect on the session so far, as well as continued to organize the stick notes thematically on the board.
After the brake, facilitators help the group to draw connections between sticky notes, drawing arrows between ‘causes’ and the ‘effects’ and create a final moment for reflection and closing.
When it can be used:
It is a method useful to collect and analyse data about the current needs of audiences.
It can serve as a foundation for collaboration. This method helps different individuals explore and understand how others view a specific issue. It uncovers not only perceptions of how the world is, but also what are the driving forces behind it. Systems mapping is often used to explore and shape “mental models,” which are the deep-rooted beliefs that capture how an individual makes sense of the world. The How Change Happens pilot specifically sought to bring together individuals with different perspectives, and this was considered to be a major component of its success. In the future, this activity could be a useful starting point for stakeholders who will be working collaboratively
Who it’s useful for:
The project team / organisation can use the map to understand the point of view of different stakeholders.
The clowns can use the process to create the basis of meaningful collaboration at the start of a co-creation process.
Length of process:
It is one activity, involving a 2 hour session and additional time for preparations and follow-up.
Main features - advantages:
It helps to understand the programme theory of change from frontline stakeholders’ perspectives – which can be different from the programme planners’ perspective.
Main features - disadvantages:
It can be difficult to explain at the onset and may feel intimidating or very different from what is typically done.
Planning and managing this discussion successfully requires a highly skilled facilitator. It is also useful to have a second facilitator assist with the white board.
Guidelines for implementation:
Choose your guiding question
A general framing question results in ample discussion but less depth. Part of a systems mapping activity is to define the boundaries of the system that will be mapped. For the first piloting of the activity, it was considered useful to have a broad question (the system boundary) to ensure there would be sufficient content to discuss. With more experience and planning, in the future similar activities could focus in on areas of particular interest.
Decide if you will do it online or offline.
Systems mapping can be done virtually, with limitations.
Limit the session to 2 hours.
The session should be limited to 2 hours, as it is considered that this was the maximum time that participants would be willing to spend and able to pay attention. Typical systems mapping activities require significantly more time for participants. In addition, due to the limited time and the desire to avoid technical difficulties, the second facilitator took the responsibility of writing sticky notes on the white board and drawing connections, but the method is originally intended for participants to take the lead on these activities.
Tool in practice:
During the ClowNexus project, “How change happens” took the form of an online 2-hour workshop facilitated in the local language to generate ideas on the different factors that influence a change during or after a clowning visit. This provided insight into the potential benefits and impact of healthcare clowning.
Attachments / Images:
Origin of the tool:
This is an adaptation of Systems Mapping. Systems mapping can take a range of formats, from causal loop diagrams that show relational dynamics and systems change across a large number of interconnected factors, to influence mapping that shows the relationships between proximal causes and effects.
Art Voices
- Category: artists, family carers, institutional carers, Learning Tools, Research, target groups
Name of the tool:
ART VOICES
What the result will look like:
A collection of pictures and short testimonials
Description of the tool:
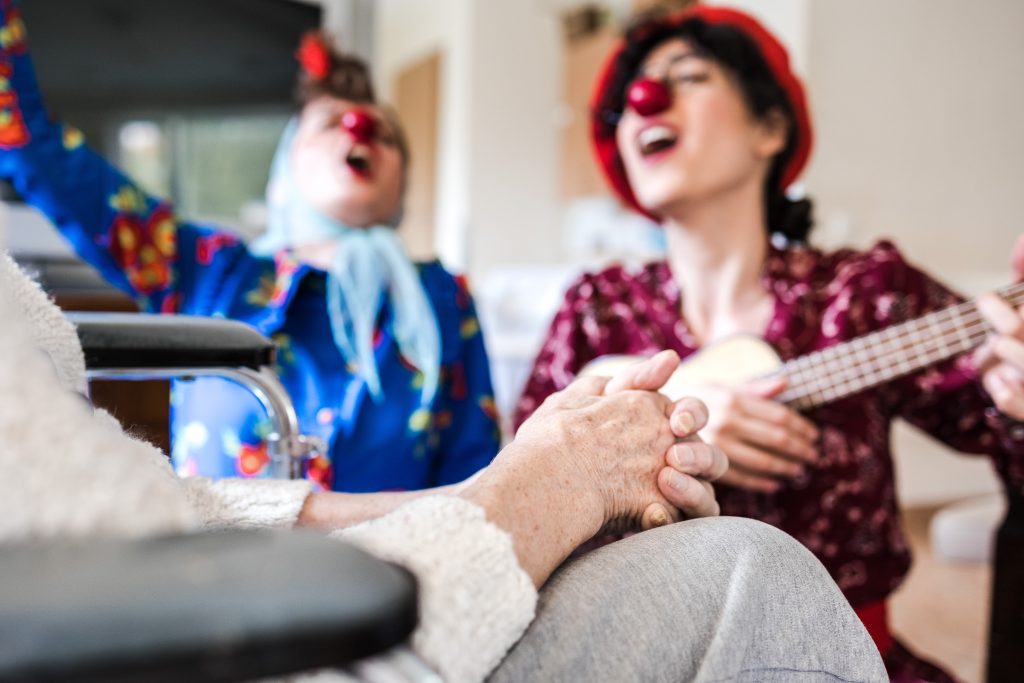
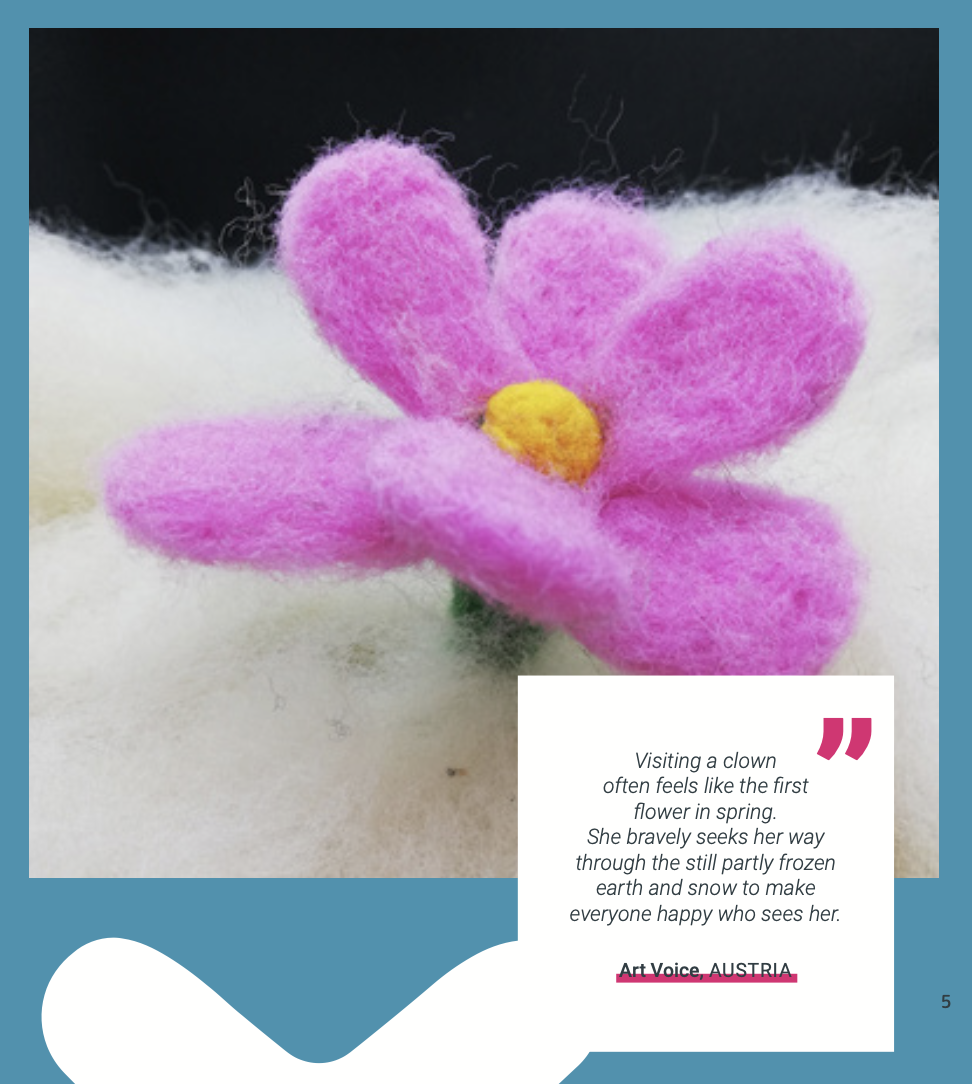
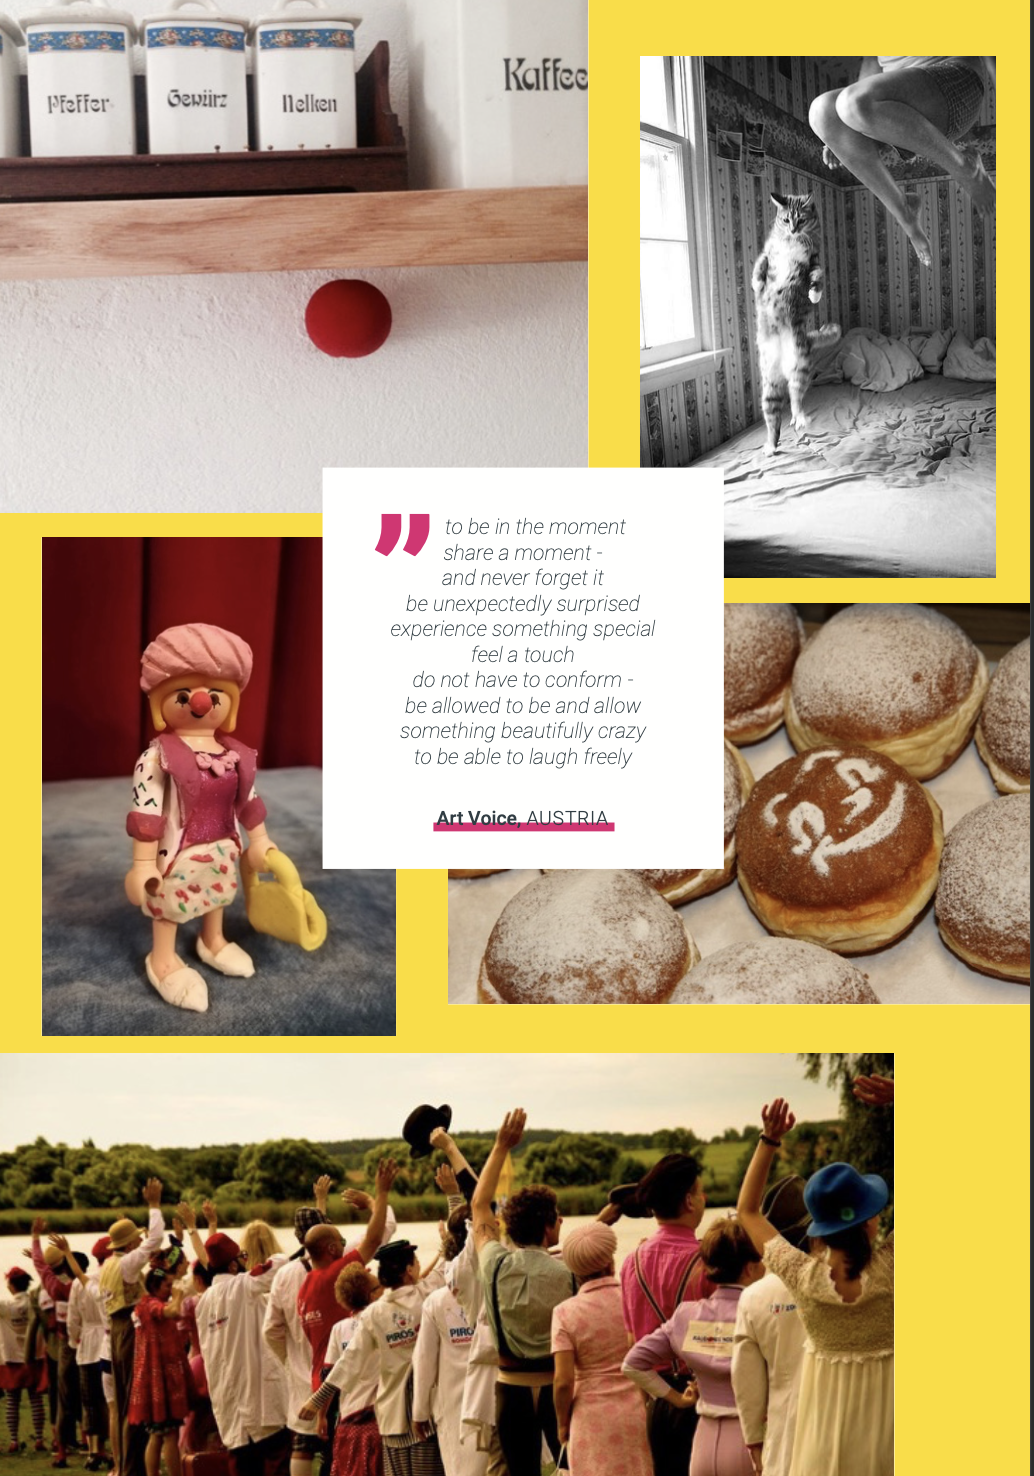
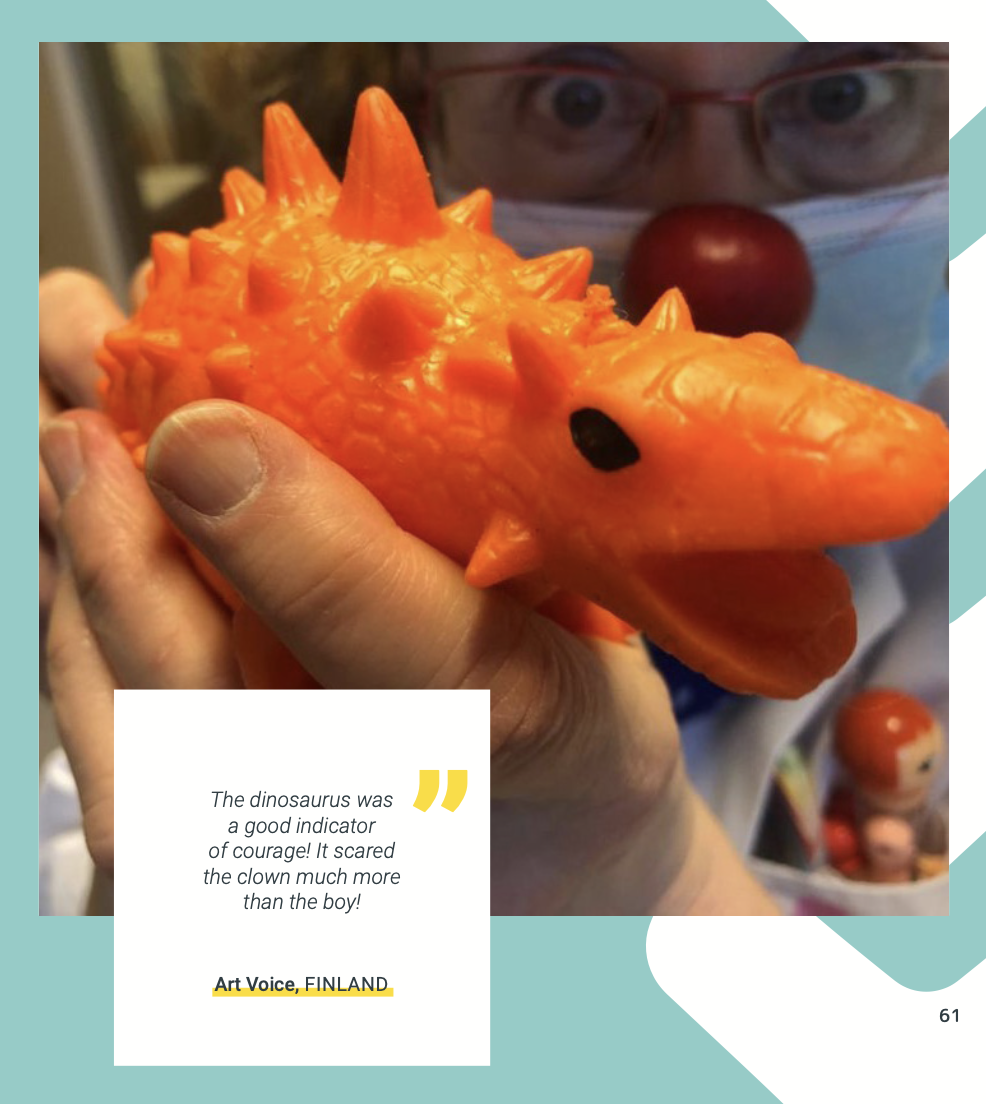
Art Voices is a participative method that uses photography and small testimonials to gather personal views on a specific topic.
The participants receive a question (such as “What are the benefits of healthcare clowning?”) and are asked to respond with their own photo and a small text explainig / narrating the image. Participants also have the option to respond with another type of art, such as a drawing.
By using photo submissions in response to a question prompt, this activity invites broader and more creative responses to qualitive questions, and may be particularly useful for gaining the perspectives of groups that are more comfortable expressing through image.
The activity can be repeated over time to understand shifts in themes and perspectives.
When it can be used:
Possible uses:
– to evaluate interventions (e.g. How did the visit make you feel?)
– to explore the viewpoints of participants and family members
Who it’s useful for:
The project team / organisation can use the findings to shape interventions. Photos and captions can be used in raising awareness activities (keep in mind that you need to have consent for this).
The clowns can use the insights to understand different points of view on their work.
Length of process:
It is a short-term process that implies consecutive related steps.
Main features - advantages:
The ability to explain ideas and experiences using visual images rather than words.
The method generates more creative expression than others.
Main features - disadvantages:
– It is time consuming in regards to preparing the instructions, sending the instructions, collecting the responses.
– Including a final sharing session is highly recommended, but presents practical concerns.
– It is important to consider the permissions and parameters of the photo submissions. Pictures should follow strict consent guidelines and ethical requirements that need to be made available to all those involved.
Guidelines for implementation:
Choose a framing question. One idea is ‘What does clowning mean to you? You can suggest another, similar question that makes sense in your context. Some other ideas are, “What feelings does a clown visit bring?” “How does clowning affect you and those around you?” You can also focus it on one of the audiences, like “What benefits does clowning have for children with disabilities?”, “How does clowning affect children with autism?” etc. ]
Decide how the photos will be shared/used. You may want to do an exhibition or a virtual gallery show. You might also consider how you could share the results with participants, even if you don’t hold an event. For example, a selection of photos will be shared on our social media, or we will send you a slideshow, etc. People are generally more willing to participate if they know that they get to see the results (and I’m sure they will find it interesting!)
Protect privacy/photo consent. Emphasize that photos should not be of participants, minors, and vulnerable groups. Please include in the instructions any additional privacy/safeguarding guidelines from your organization for informed consent. An analysis plan is required in advance, which outlines how the submissions will be used by participants as well as data collectors. For the purpose of this evaluation, thematic coding of the art and accompanying narrative was used. Collecting the characteristics of respondents in a standard way can be useful in the analysis.
Choose a deadline. 1-2 weeks should be sufficient to complete the activity. Too little or too much time may make it difficult for the participants.
Tool in practice:
In ClowNexus, the tool was used to understand current clowning experiences and to prepare for new clowning activities with the elderly and children.
